Monday, December 3, 2012

Plate Rail for Dan & Steve

I recently completed a fun project crafting and installing a plate rail in the dining room of Dan & Steve's home.  As can be seen below, there is a line on the wall, which has a gap of about three inches needing to be covered.  The story goes that there was something there originally, but previous owners had removed it and covered it (partially) with a 1x4 pine board that does not match the paneling.  I was engaged to create a plate rail as a decorative and functional architectural feature.


Some design inspiration from the mantel in the living room.


A mock-up of the new design a pleasing combination of combination of fabricated pieces, molding and dimensional lumber; red oak stained to a mahogany brown, closely matching the existing paneling.


One of the blocks being glued with molding.


Installation of the blocks, crown molding and shelf.  The facing molding has yet to be attached.


A more finished look.  A section of the plate rail that has been completed.


The project is finished, literally!  Everyone is happy.  When I get the chance I will post a few photos (with better light!) of the final project with the furniture back in place.

France Trip

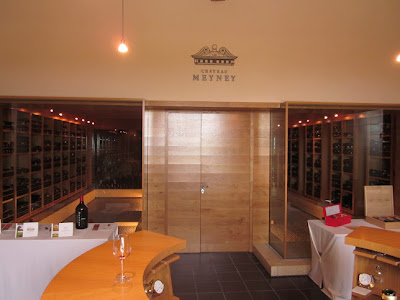
A brief note about something I learned while visiting Bordeaux, the French are not afraid to embrace the new if it is done right.


I'm not an ultra-modernist, I like to preserve and restore whenever possible, but I have to admit that when it is done right a new approach can be quite stunning.


Chair Restoration for Mark

Mark asked me to restore this family heirloom, a high chair once owned by his grandmother.  It mostly needed to be cleaned up, with paint drips removed and one minor repair to replace a missing rung of the chair.


The chair has been gently cleaned up, no more paint spots, and is being finished with a tung oil.  The rung has been replace and stained to match.


Friday, October 5, 2012

Just started a new project for Sergio.  His kitchen is in need of small modifications.  The first part was to make an existing pantry suitable as a place for a built-in looking refrigerator.  The doorway is too narrow and will need to be widened in order to accommodate the fridge.


Recently completely a project for Carmen and Luis, replacing their back steps and adding some railing to their deck.  I removed the old steps and constructed new ones from treated lumber, then painted the new steps to match.

The old steps were falling down and rotted, (Not a moment too soon to replace them!):


Freshly constructed steps, now anchored to the brick pillars; reinforced with three stringers, not two; nor more untreated wood.  These steps should last a lot longer.  I've added a seventh step to achieve a normal step height:


The final product, painted to match the existing deck:


Obviously, the choice was to make the steps fit into the existing color scheme.  Not matter what, they are much stronger and sturdier than the previous ones.

Friday, September 21, 2012

Another project I have been working on these past couple of weeks has been a refurbishment of double hung wooden sash windows on the third floor of a Karen and Mike's house.  Some of the windows require a little bit of repair, others need to have the counterweights reattached, and the "G" hooks need replacing, but for the most part, it is a matter of loosening the windows, stuck under layers of paint.  Once this is done, there is scraping and sanding to do, which allows the windows, bottom and top, to move freely.  In the end, most windows move well, although there is a certain amount of quirkiness that people with modern windows would not find a familiar experience.  Such as it is, the windows are a hundred years old.  That is testament to how well they were made and the quality of the design.  It also points to the value in keeping up old things.  Well taken care of, they can still be usable and perhaps a better match with the house itself.


I have recently completed work on the entryways of two neighbors.  In the first case, I constructed new columns and did some repair work to the eave of the roof over the front door.  In the second it was general refurbishment, including repairs to the eaves,  [a common problem, those eaves take a beating from exposure to the elements!], caulking and repainting.

Before:


Nearly finished:


Friday, September 14, 2012

The purpose of this blog is to record some of the travails that come with owning an old home in the Forest Hill neighborhood of Newark, NJ, trying to improve the home and, along those same lines, the work I do for neighbors.

Currently, I am prepping my own house for appraisal, refinancing to take advantage of the low rates.  As such, I have mainly been doing some painting, as well as other small projects, like reglazing windows.

I have also been working on some projects for neighbors, a new service, working as a handyman/carpenter/woodworker.  So far, that has included working on rebuilding the front entry's for a couple of neighbors, with some light painting.  I am also working on fixing up some old windows for another neighborhood family.

There are pending proposals for two other projects in the neighborhood, one of which would entail more woodworking and carpentry skill.  Lots of photos will follow.  But for now, I'll leave you with photos of the wine cellar I built out of an old coal bin.

This is my house.  Some of our neighbors here know it as it as the one with the red door:


The wine cellar at an early stage, with some insulation and one rack in place:


The wine cellar at a more advanced stage.  The ceiling and walls are finished and a door is in place:


Additional racking has been added, and filled.  The next step would be a library effect: